前往https://bintray.com/ 注册账号
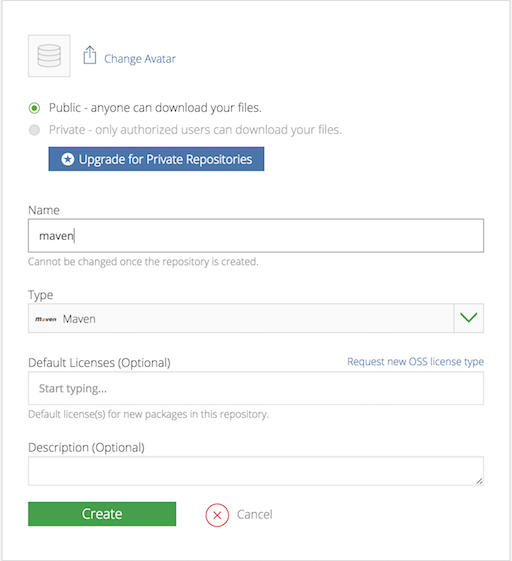
在bintray中创建一个maven仓库
在Android项目中的根build.gradle中,添加如下代码:
1
2
3
4
dependencies {
// ...
classpath 'com.novoda:bintray-release:0.5.0'
}在local.properties文件中添加bintray的用户名和API key
1
2
bintray.user=xxxxx
bintray.key=xxxxxxxx在项目根目录下创建secret.gradle用于读取local.properties中配置的用户名和API KEy
1
2
3
4
5
6
7
8
//加载资源
Properties properties = new Properties()
InputStream inputStream = project.rootProject.file('local.properties').newDataInputStream()
properties.load( inputStream )
//读取字段
ext.bintray_key = properties.getProperty('bintray.key')
ext.bintray_user = properties.getProperty('bintray.user')在library所在的module中的build.gradle中,添加bintray-release插件的应用和secret.gradle的配置;
1
2
apply plugin: 'com.novoda.bintray-release'
apply from: rootProject.file("secret.gradle")在library所在的module中的build.gradle中,添加发布到JCenter的参数配置;
1
2
3
4
5
6
7
8
9
10
11
publish {
userOrg = 'xch168' // bintray.com用户名
groupId = 'com.github.xch168' // jcenter上的路径
artifactId = 'androidUtil' // 项目名称
publishVersion = '0.0.5' // 版本号
desc = 'Oh hi, this is a nice description for a project, right?' // 描述,不重要
website = 'https://github.com/xch168/AndroidUtil' // 网站,不重要;可以填写GitHub中的项目地址
bintrayUser = bintray_user // bintray.com的用户名
bintrayKey = bintray_key // bintray.com的API key
}在项目根目录下创建快速发布脚本publish.sh(Mac OS) or publish.bat(Windows)
1
2
3
4
5
// Mac OS
./gradlew clean build generatePomFileForReleasePublication bintrayUpload -PdryRun=false
// Windows
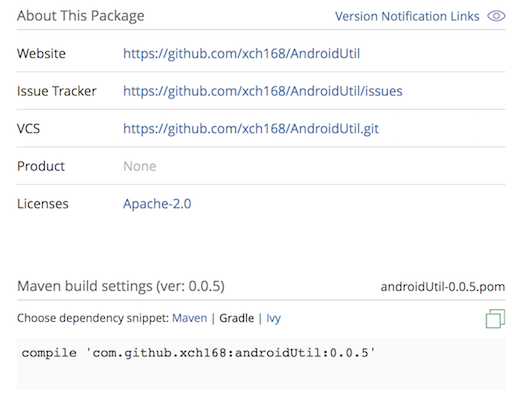
gradlew clean build generatePomFileForReleasePublication bintrayUpload -PdryRun=false执行publish脚本,发布项目,项目发布成功后进入bintray.com,可以看到如下:
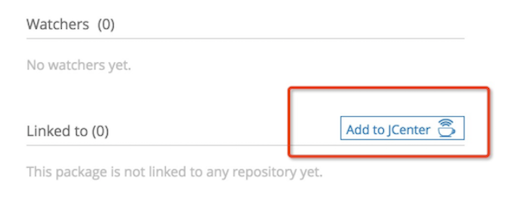
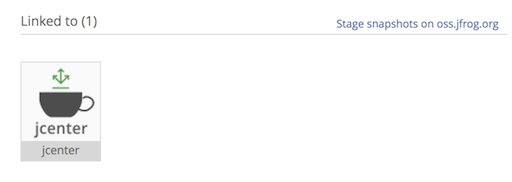
将项目同步到JCenter(需要等待审核)
使用自己发布的库
1
compile 'com.github.xch168:androidUtil:0.0.5'
使用bintray-release快速发布库到JCenter
本文标题:使用bintray-release快速发布库到JCenter
文章作者:辉天神龙
发布时间:2017-07-23, 21:38:20
最后更新:2017-07-23, 23:36:45
原始链接:https://xch168.github.io/2017/07/23/use-bintray-release-publish-lib-to-jcenter/
许可协议: "署名-非商用-相同方式共享 4.0" 转载请保留原文链接及作者。